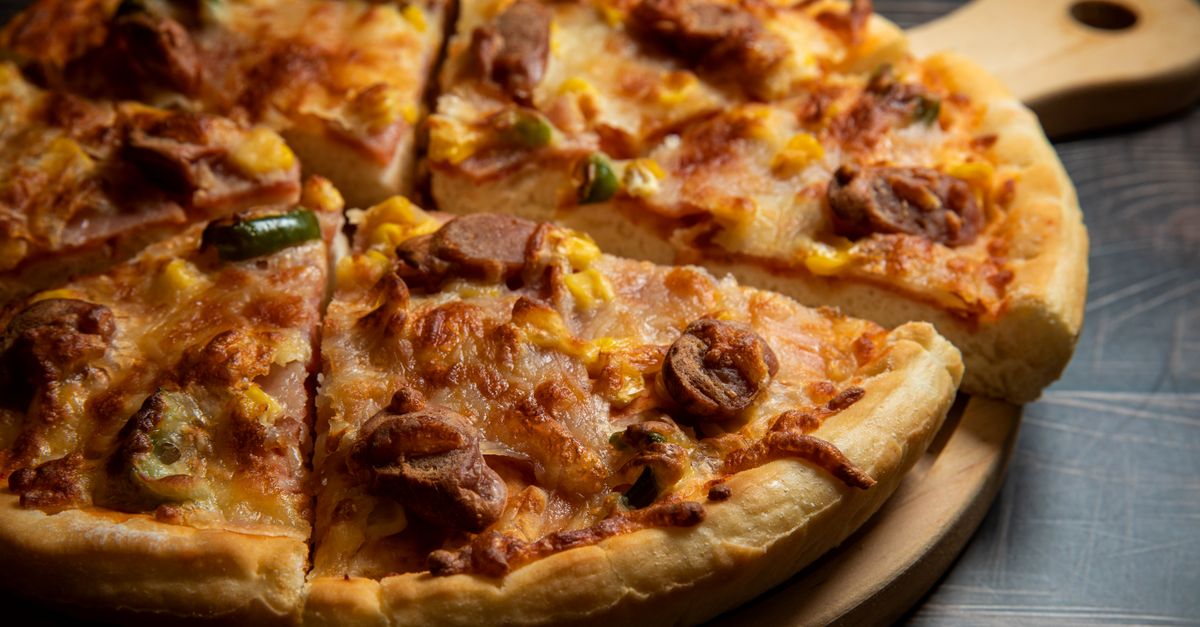
Why Your Homemade Pizza Crust Isn't Crispy (And The Pro Secrets That Deliver Pizzeria-Quality Crunch Every Time)
You’ve spent the afternoon crafting the perfect sauce, meticulously grating fresh mozzarella, and arranging your favorite toppings. The aroma fills your kitchen, promising that authentic pizzeria experience. But then, it emerges from the oven: a beautiful, bubbling pizza… with a disappointingly soft, chewy, or even soggy crust. The crisp, golden-brown perfection you envisioned is nowhere to be found. Instead, you’re left with a floppy slice that can barely hold its own. If this scenario sounds all too familiar, you’re not alone. In my experience as a home cook who once battled perpetually limp pizza crusts, this is one of the most common frustrations. It feels like you’re doing everything right, yet that satisfying crunch remains elusive.
The truth is, achieving a truly crispy pizza crust at home involves more than just a good recipe. It’s about understanding the subtle, yet critical, interplay of heat, moisture, and technique. Many home bakers, myself included, often overlook these nuances, leading to consistently subpar results. What changed everything for me was a deep dive into the methods used by professional pizzaiolos, translating their high-heat, rapid-cook environment into a home kitchen setting. It’s not about buying expensive new equipment, but about optimizing what you already have and making a few strategic adjustments to your process.
Key Takeaways
- Preheating your pizza stone or steel for at least an hour at maximum oven temperature is non-negotiable for a truly crispy crust.
- Minimize moisture in your dough, toppings, and sauce to prevent steam from creating a soggy base.
- Avoid over-flouring your peel; excessive flour can burn and create a bitter, tough layer beneath your crust.
- Embrace the ‘less is more’ philosophy with toppings to ensure even cooking and maximum crispness.
- Consider a hybrid bake, starting on the stovetop or using a broiler, for superior bottom and top crust development.
The Fundamental Flaw: Not Enough Heat, Not Fast Enough
When I first started making pizza at home, I’d dutifully preheat my oven to 450°F (232°C) for 15-20 minutes, pop in my pizza, and expect miracles. Predictably, I’d get a decent pizza, but never that blistering, crackly crust that truly defines a great slice. The mistake I see most often is underestimating the sheer thermal energy required to achieve true crispness. A standard home oven, even at its highest setting, struggles to replicate the 800-1000°F (425-540°C) blast of a commercial pizza oven. The crust needs an intense, immediate shock of heat to rapidly cook and crisp before the moisture has a chance to turn it gummy.
My game-changing realization was this: it’s not just about the oven temperature, but the surface temperature the pizza cooks on. A thin baking sheet, while convenient, simply doesn’t retain enough heat to properly crisp the bottom. This is why a pizza stone or, even better, a pizza steel, is non-negotiable for a genuinely crispy crust. But merely having one isn’t enough; you must preheat it correctly. I now preheat my pizza steel for a minimum of one hour at the highest temperature my oven can reach, usually 500-550°F (260-290°C). This extended preheat ensures the stone or steel is saturated with heat, creating a thermal mass that mimics a professional oven floor. When the raw pizza hits that super-hot surface, the moisture in the dough instantly turns to steam, creating those coveted bubbles and a rapid, even crisping from the bottom up.
The Moisture Menace: How Water Sabotages Your Crunch
Think about it: what does water do when heated rapidly? It creates steam. While some steam is good for puffing up your crust, too much moisture, especially in the wrong places, turns that crisp into a soggy disappointment. This was a hard lesson for me, especially coming from a background of cooking methods where adding liquid is often key. With pizza, however, you’re fighting a constant battle against excessive hydration.
First, consider your dough. While a high-hydration dough can create a beautiful open crumb, it’s also more prone to sogginess if not cooked correctly. For maximum crispness, especially in a home oven, a slightly lower hydration dough (around 60-65%) can be more forgiving. But the biggest culprits are often the toppings and sauce.
- Sauce: A watery sauce will seep into your crust and make it soggy. I learned to reduce my pizza sauce significantly on the stovetop before applying it. You want a thick, concentrated flavor, not a runny liquid. Consider a no-cook sauce using high-quality crushed tomatoes seasoned simply, which often has less inherent water than a simmering sauce.
- Cheese: Fresh mozzarella is delicious, but it’s packed with water. If you’re using it, always blot it dry with paper towels before adding it to your pizza. Better yet, consider a low-moisture, whole-milk mozzarella, which melts beautifully without releasing excess liquid. Avoid pre-shredded cheeses as they often contain anti-caking agents that hinder melting and can affect texture.
- Vegetables: High-water content vegetables like mushrooms, spinach, or bell peppers need special treatment. Sauté them lightly beforehand to cook off excess moisture, or roast them until slightly caramelized. If you add them raw, they’ll steam on top of your pizza, releasing water onto your crust and preventing it from crisping. Even onions benefit from a quick sauté.
Every element on your pizza should be as dry as possible, ensuring that the oven’s heat is focused on browning and crisping, not evaporating extraneous water.
The Peel Pitfall: Over-Flouring and Its Bitter Consequences
Launching a raw pizza onto a scorching hot surface is notoriously tricky. Naturally, the instinct is to dust your pizza peel liberally with flour to ensure a smooth slide. I used to coat my peel so heavily it looked like a winter wonderland. The result? A pizza that would slide off, but with a bottom crust that was either tough, strangely bitter, or even slightly burnt in spots.
Here’s what happens: all that excess flour, when it hits a 500°F+ (260°C+) pizza stone or steel, burns instantly. This burned flour then acts as a barrier, preventing direct contact between the dough and the super-hot surface. Without that direct contact, you lose the intense conductive heat transfer necessary for rapid crisping and browning. The burning flour also imparts a bitter, acrid taste that can permeate your otherwise delicious crust.
The solution is precision and alternatives. Use just enough flour to prevent sticking, and no more. A fine dusting of semolina flour is even better than regular all-purpose flour. Semolina is coarser, acting like tiny ball bearings that allow the pizza to slide more easily, and it’s less prone to burning than fine flour. Even better, many pros use a mix of half semolina, half regular flour for optimal glide. Practice your launch with an uncooked, topped pizza on a cold peel a few times to get the feel for it. A quick, decisive jerk is better than a slow push.
The Topping Trap: Less is More for Optimal Crispness
It’s tempting to load your pizza with every delicious ingredient you can imagine. After all, you’re making it at home, so why hold back? But in the pursuit of the ultimate crispy crust, an overloaded pizza is its own worst enemy. This was a revelation for me. I used to pack on so many toppings that my pizzas looked like edible mountains, only to find the crust buckling under the weight.
Overloading a pizza creates several problems that directly impede crispness:
- Moisture buildup: More toppings mean more moisture. Even pre-sautéed vegetables still contain some water, and a mountain of cheese will release more liquid than a thin, even layer.
- Uneven cooking: A thick layer of toppings insulates the crust, preventing the top from browning and crisping properly. It also creates dense spots that cook slower than others.
- Weight: The sheer weight of too many toppings can compress the dough, preventing it from rising and developing an airy structure. It also makes the pizza harder to handle and more prone to tearing during the launch.
Embrace restraint. A genuinely crispy pizza crust shines when the toppings are balanced and allow the crust to be the star. Aim for no more than 3-4 toppings, applied in a single, even layer. Distribute them thoughtfully, leaving a small border for the crust to puff up and achieve those beautiful air pockets. Think of the classic Neapolitan pizza: sparse, high-quality ingredients that allow the crust to truly sing.
The Broiler Boost: A Hybrid Approach to Perfection
Even with a super-hot stone or steel, a home oven often struggles to brown the top of the pizza as effectively as the bottom. You might get a perfectly crisp base, but a pale, undercooked top. This is where a hybrid baking method, leveraging your broiler, can be a game-changer. This was the final piece of the puzzle for me in achieving truly professional results at home.
My strategy goes like this:
- Extreme Preheat: Heat your pizza stone/steel for at least an hour at maximum oven temperature, positioned on the highest rack setting that still allows your pizza to fit comfortably when launched.
- Initial Bake (Bottom Crisp): Launch your pizza directly onto the preheated stone/steel. Bake for 3-5 minutes (exact time depends on your oven and desired crispness) until the bottom crust is golden and beginning to blister. Resist the urge to open the oven frequently, as this releases precious heat.
- Broiler Finish (Top Brown): Once the bottom is crisping up, turn on your oven’s broiler (often on high). Keep a very close eye on it! The broiler works rapidly, and cheese can go from perfectly melted to burnt in a matter of seconds. Broil for 60-90 seconds, or until the cheese is bubbling and slightly charred in spots, and the crust edges are beautifully browned.
This two-stage process ensures you get that intense bottom heat for a crackly base, followed by a powerful top-down blast for perfectly melted, slightly browned cheese and beautifully charred crust edges. It mimics the rapid, high-heat environment of a commercial oven far better than a single bake setting. Just remember: never walk away from a pizza under the broiler!
Frequently Asked Questions
## How do I prevent my pizza from sticking to the peel when transferring it to the oven?
The key is minimal, even dusting of semolina flour (or a 50/50 mix of semolina and regular flour) on your peel, not excessive regular flour. Build your pizza quickly on the peel. If you’re nervous, give the peel a quick shake after adding the dough to ensure it’s still loose. If it catches, gently lift the edges and blow a puff of air under it, or add a tiny bit more semolina. Practice with a cold, topped pizza first to get the feel for a swift, decisive launch.
## My oven doesn’t go above 450°F (232°C). Can I still get a crispy crust?
Yes, absolutely! The principles remain the same. Maximize your oven’s heat capacity by preheating your pizza stone or steel for at least an hour at 450°F (232°C). This extended preheat is crucial for heat saturation. Consider using the broiler method as described in the article for the last few minutes of baking to get a good top crisp and browning.
## Can I use a baking sheet instead of a pizza stone or steel?
While technically possible, a standard thin baking sheet will rarely give you the same level of crispness. It doesn’t retain enough heat. If a stone or steel isn’t an option, use your heaviest-gauge baking sheet, preheat it empty for at least 30 minutes at your oven’s highest temperature, and consider flipping it upside down to create a flatter, easier surface to launch onto. However, a stone or steel is genuinely a worthwhile investment for serious home pizza makers.
## How do I know when my pizza crust is perfectly crispy?
Visually, you’re looking for a deep golden-brown color on the crust edges and bottom, with some charred spots. The crust should also sound hollow when tapped. When you lift a slice, it shouldn’t droop excessively (though some slight give in the middle is normal for Neapolitan-style). The true test, of course, is the bite: a satisfying crunch followed by a tender, airy interior.
## Should I oil my pizza stone or steel?
No, never oil a pizza stone or steel. It can smoke, burn, and potentially ruin the porous surface of a stone, or create a sticky mess on a steel. The high heat and proper dusting of semolina flour on your peel should prevent sticking naturally. A well-seasoned pizza steel will develop a natural non-stick surface over time, similar to cast iron, but this comes from residual oils from cooking, not direct oiling.
The Journey to Pizzeria Perfection at Home
Achieving that elusive, perfectly crispy pizza crust at home isn’t about magic; it’s about mastering a few key principles and patiently applying them. From intensely preheating your cooking surface to meticulously managing moisture, every step plays a crucial role. The biggest shift for me was moving away from the
Written by Clara Jenkins
Nutrition & Gut Health
A registered dietitian who simplifies nutrition into delicious, everyday choices.
You Might Also Like
Why Your Expensive Coffee Maker Underperforms (And The Overlooked Mistakes Ruining Your Brew)
Investing in a high-end coffee maker doesn't guarantee a great cup. Learn the common mistakes that sabotage your brew and how to fix them for café-quality coffee at home.

Why Your Home Still Smells Stale (Even After Cleaning) — And What Actually Works for Real Freshness
Discover why your home's air still feels stale after cleaning and the surprising culprits. Learn Dr. Lena Sharma's practical tips for lasting freshness.

Why Your Home Always Feels Stuffy (Even With the Windows Open) — And What Actually Works for Real Fresh Air
Discover the overlooked reasons your home feels stuffy, even with open windows, and learn effective strategies for lasting fresh air, not just temporary relief.